Examples#
This section contains examples which demonstrate the usage of the different controllers. We’ve implemented both general and robot specific examples. To build the robot specific examples, see Installation.
Admittance controller:
The examples are available in C++ and Python.
Admittance Controller#
General example#
This example demonstrates the general usage of the admittance controller and shows how it reacts to a force disturbance.
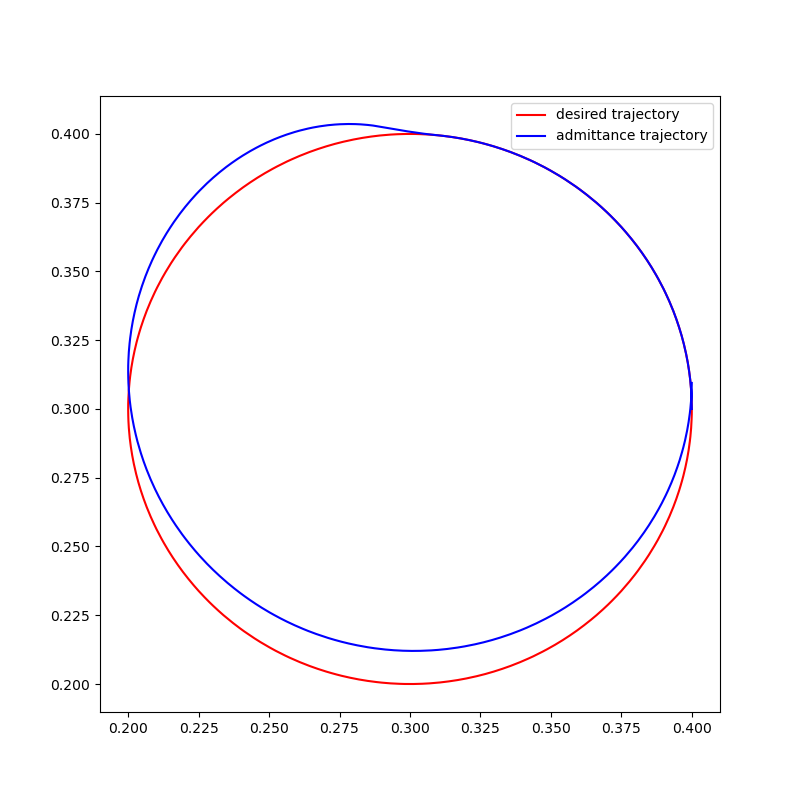
The reference trajectory (red) is a single circle in the xy plane starting at (0.4, 0.3) and moves counter clockwise. The controller is following this trajectory, when at (0.3, 0.4) a force pointing in positive y is injected. The reaction of the controller to this disturbance is plotted in blue.
The C++ code in this example generates the trajectories and writes them into a csv file. They can then be plotted using the plot_trajectory.py script in the scripts/admittance_controller folder.
Circle example (UR)#
This example demonstrates how to implement an admittance control on a UR which follows a specific trajectory while being compliant to disturbances at the end-effector. The desired trajectory is a circle starting at the current location of the robot. The robot will move follow that circle and return to it when it is disturbed by a force. How quickly and forceful it returns to the trajectory is regulated by the positional gain. The damping is typically set to be critically damped to ensure controller stability.
Note
Remember to set the payload of the robot properly.
Kinesthetic teaching example (UR)#
This example shows how the admittance controller can be used for kinesthetic teaching on a UR, meaning that a user can easily move the robot around by grabbing it at the end-effector. This is achieved by setting the positional and orientational gain to zero, which results in compliant behavior without any forces pulling the robot back to position / trajectory. The damping regulates the sensitivity to the input forces and torques.
Note
Remember to set the payload of the robot properly.